Showing posts with label bicycle bit earrings. Show all posts

Tuesday, February 7, 2012

Frayed Sew

I'm excited to announce that you can now buy my Bicycle Bit earrings in Helena, MT! I just filled an order to consign in Frayed Sew; a chic boutique full of hand made treasures and green goodies. It'll be interesting to compare the sales in Helena vs. Missoula. Looking forward to feedback.


A new favorite of mine:


Another Favorite:


So it looks like they're all ready to go right? Well i finished making the 20 pairs they ordered friday afternoon, and I'd printed my artist statement, and put each pair on a tag. I'd also taken individual photos, and made a contact sheet with item codes and prices to email to the store for inventory purposes. However i still ended up working until midnight, on a FRIDAY night so I could drop everything off on Saturday because ....

I had to write by hand, on each card, first in pencil, then in pen, my brand name, blog site, and etsy store. This took about three hours somehow. I've officially decided I'm having a stamp made with all this info so I never have to handwrite my business info again. Haha yikes.


also, here's a peek at some new designs for necklaces and bracelets


Tuesday, October 25, 2011

Funky Junk Competition


This past weekend was the 3rd Annual Funky Junk Fashion show at Green Light. Every year they invite anyone interested to create an outfit out of recycled materials. Green light is a local boutique in downtown Missoula which specializes in green products; clothes made with organic cotton, upcycled garments, fair trade items, sustainable home decor, etc.
  

I competed last year and had a blast. I entered with my friend Sofi and we both spontaneously made our outfits 3 days before the show. This is the outfit I made last year; It won “most creative use of recycled materials” which awarded me a $75 gift certificate!


This year I put more time into my outfit, and had my vision developing since last year. I knew I wanted to use coffee filters, and had been salvaging them from our compost over the summer and fall. (I did have a few set backs when entire piles gathered mold)

This was my first time working on a dress form, which was so much fun. It’s like a 3- D inspiration wall of all your ideas; you drape your materials and they suddenly come to life.

I started on this very curvy form because my slimmer one was unavailable. I bought this one in an antique shop, and I’m pretty sure it’s from the 40’s. VERY old and falling apart but it looks awesome sitting in my room.

My first draping session with this dress form, was expiremental. I didn’t have my coffee filters together yet, so I used pattern paper where I wanted the filters to go. I originally thought I’d make a mini dress out of the rubber bike inner tubes but they were brutal to sew through by hand (I don’t have an industrial sewing machine). I remembered I’d kept my scraps of canvas from my painting class, so I dug them out, and draped a short pleated skirt. I knew I'd saved those scraps for some reason ;)


I then retrieved my slimmer form which was practically identical  to my model's actual measurements (which made fittings so much easier). So here you see my outfit coming together. The top is re-used from last year, but I basically had to re-stitch the whole thing anyways, plus re-work all the closures in the back, which lead to me stabbing my fingers with pins and killing my fingernails since I tend to use them as a thimble. If that makes any sense to you…
You also can see the canvas skirt, and my first steps in laying down the coffee filters. Keep in mind that this is all just pinned together, so the next steps involved laying down the permanent stitches, figuring out how and where to put closures so I can get it on and off my model etc. etc.


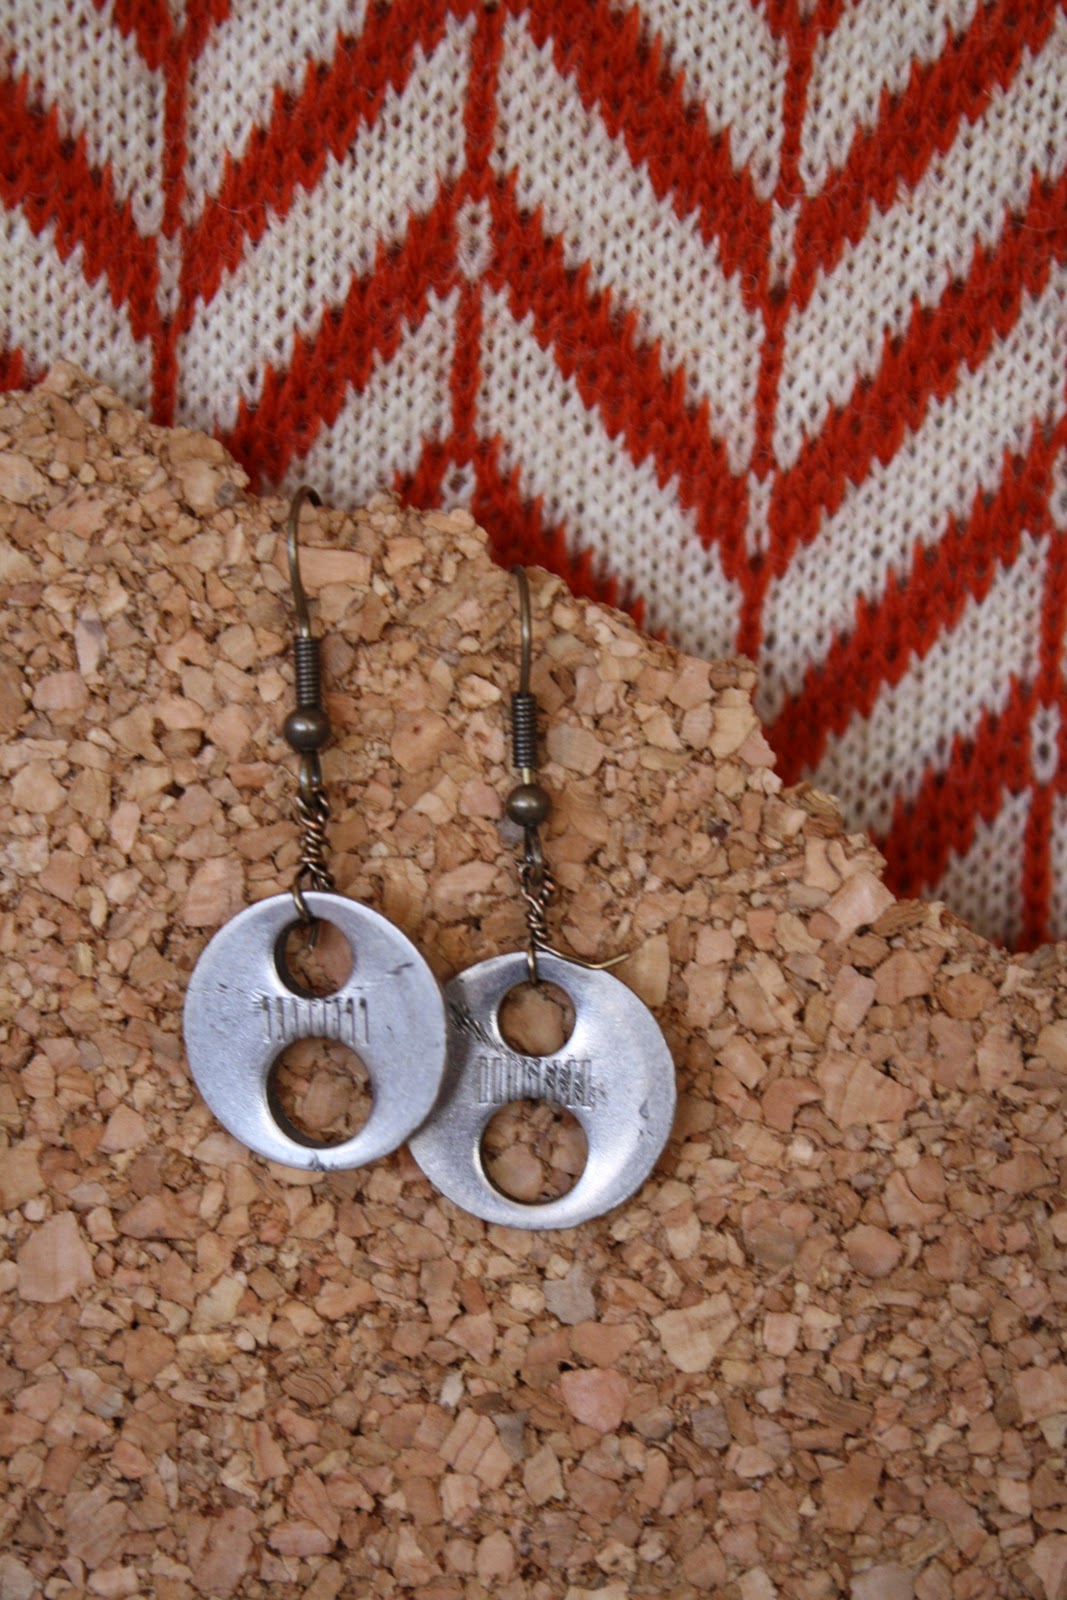
Below is photo of my model getting dressed the night of, a good view of the canvas skirt (Which I tried dip dying in coffee which looked more like I just spilled coffee on it.. not sure whether I'd do that again) and this is without the trail of coffee filters attached to it. The other photo is a close up of my Bicycle Bit Earrings, this pair in particular was inspired by galaxies.


This year I won crowd favorite. My model was Janyssa Overturf, just a friend who knows how to work it. She had her hair and make up done by Boom Swagger, who do everyone’s for the show, and as you can see from the group photo (which wasn’t everyone just to clarify) that they went for a consistent look this year, not exactly my styling request but I think it worked and I did like that everyone looked cohesive and unified.


so just a side note about the skirt; I ended up making the train removable, it was a layer of pattern paper that went down to the floor, and I glued the coffee filters on(and they are used ones, hence the coffee grounds still in tact). 


To the left is a photo of myself on the runway, and to the right is Janyssa in motion. Funny story; right before she stepped up to the runway she bent over and her top came unsnapped (I know it makes me look bad but I mean I could've used safety pins, so at least I put in legitimate closures despite their failure). She was so good at keeping her cool, just walked with one arm behind her holding her top on, kept calm and collected, and a slow even pace, and THIS is why I have her model my stuff, because nothing phases her, I know I'd have completely panicked.

Thursday, October 6, 2011

Bicycle Bit Earrings

Exciting news! I finally and officially have my bike jewelry in Upcycled! I just dropped them off at the shop where they'll be consigned and for sale asap. It's been tons of work getting everything organized, in fact I'm pretty sure it took longer to make labels, a sign, and figure out a display than it did to make the jewelry. I struggle with making big decisions about business cards, deciding on my brand name, and what paper best reflects me in my artist statement. 


To give a bit of background into what I'm making, these earrings are made of scraps from Free Cycles; the community bike shop that my uncle Bob owns/ started. They take in bikes and parts from people, sort them, and then let people come for free and build or fix up their bike. Bob lets me come in and have full access to the shop which turns me into a kid in a candy store. Also I haven’t just used my access to make jewelry, last year for sculpture classes I was constantly utilizing bike parts. Once I took an exercise bike that I found there, and converted it into a yarn spinning loom propelled by the pedals. SUPER empowering. below is a video of it, hard to see but better than a picture. It’s ironic that I’ve used all kinds of bike parts to create stuff, but still haven’t built an actual bike out of them.


But back to the jewelry. I mostly use washers because I love circles, but I take anything that inspires me. I load up my pockets, go home, sprawl EVERYTHING on the floor and start putting pieces together and arranging them to make earrings.


In the last few months I’ve been in contact with Upcycled, talking to the owners every once in a while when I'm downtown. They’re a new little sliver of a shop, and center their values on hand made products made with re-used or recycled materials. They’re a hub for all kinds of local craftspeople, it’s kind of like a mini Etsy store, with the rule that everything has to be upcycled, which I totally, 100% stand for. I'm a believer in getting creative with whatever you have lying around before going out to buy new materials.

So I’ve been working hard the last few weeks on getting everything ready to put in the store bythe 7th because they'll have a crowd coming in for their big 1st friday event showing  “Recreate Designs”.

My list of things to get done in time was basically;
  1. get price tags
  2. make a sign with an artist statement
pretty simple sounding right? wrong!

here's my step by step creative process of accomplishing the above:

first, I tried to make my own price tags. Using masking tape. this is how they turned out. Not bad, but I felt they looked a little sloppy/ unprofessional, and would be annoying for customers to remove.


I ended up buying 100 of these white tags for only a few dollars.

and then hated the white so I dipped them in coffee


then I played around with stamps and ended up with the finished product here.


For the sign, I took quite a bit of time to type it up. I messed around with fonts, sizes, backgrounds, paper types, and display. My paper choice was disappointing because it was cloth/linen textured, and then when it went through the printer, the texture just melted out. 


This is my end product. I'm not 100% satisfied with my statement display. I went a little crazy on stamps and it's slightly off center in some places but it will do for now. 


Nothing ever stops being a work in progress!!!